The Medanets app has several details designed to make your user experience as seamless as possible. We put together 5 tips to help you get more out of the Medanets app. Did you know these already?
1. Flashlight and electronic patient identification
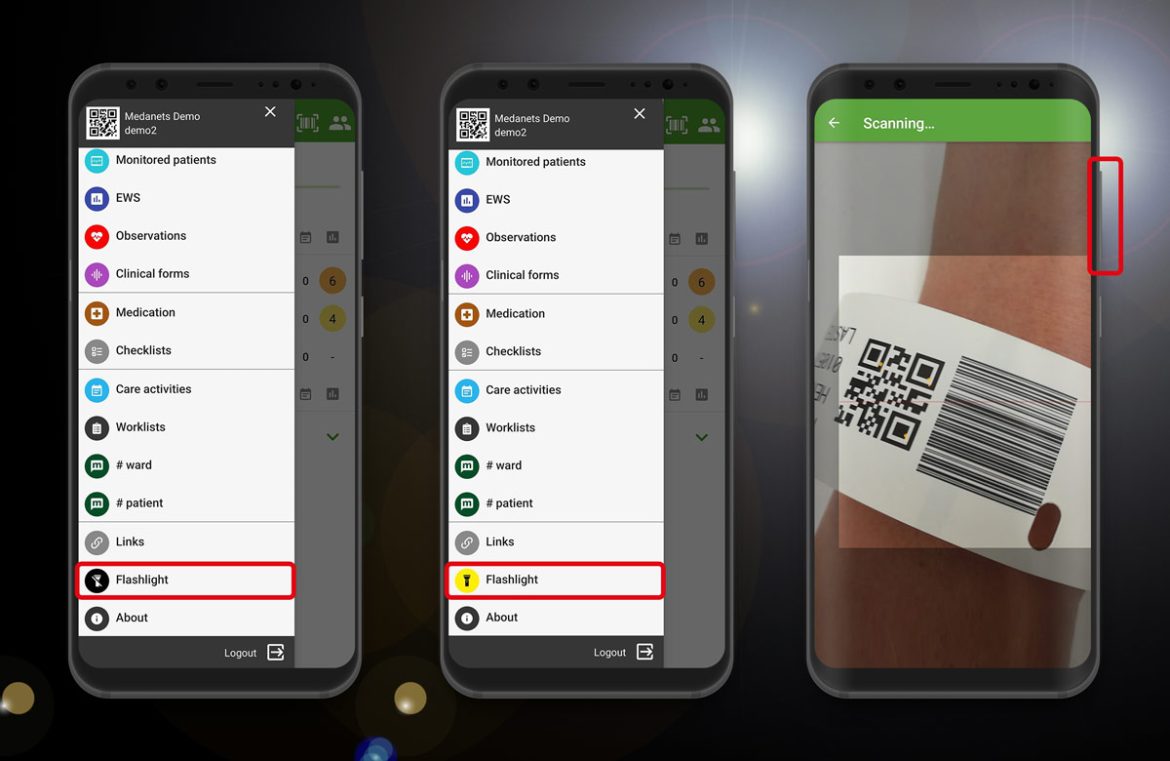
In most hospitals, patients should be electronically identified from the patient’s wristband. Scanning the patient’s wristband is facilitated by good lighting. Additional lightning is especially useful if you need to identify the patient at night. There are two ways to turn on your phone’s torch when using the Medanets app:
- Swipe right from the left side of the screen to open the main menu of the app and select torch at the bottom of the menu. The torch lights up. The torch is switched off in the same way.
- Tap the barcode icon in the top right corner of the screen to start scanning the wristband. In scan mode, the torch usually lights up by pressing the volume key up on the side of the phone. It is turned off by pressing the volume key down. This function might be different depending on the device model in question.
- If you are using Honeywell barcode scanning software that is purchased separately, the torch function can be found as a button on your phone’s screen.
The patient is switched simply by scanning the next patient’s wristband. This means that there is no need to remove the previous patient selection. However, this is also possible: first press the barcode icon in the top right corner of the screen (the button to start scanning the wristband) and then tap the back button on the device.
2. My patients
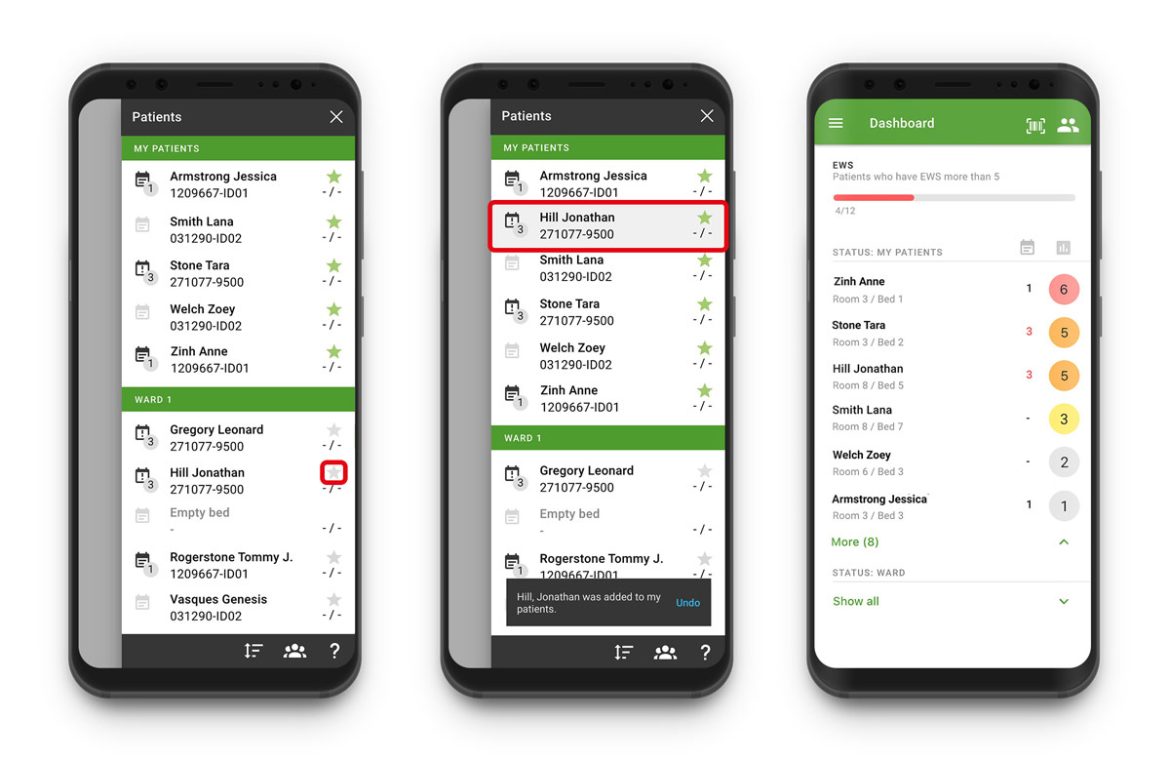
Is there a large number of patients in the ward and a long list of patients displayed in the Medanets app? The My patients function helps! Open the patient list from the Patients icon in the top right corner of the app or swipe left from the right edge of the screen to open the Patients menu. You can mark the patients as your own by tapping the star icon next to the patient’s name. This will show your patients as a separate group at the beginning of the patient list and the Dashboard (if enabled).
3. Filtering of values
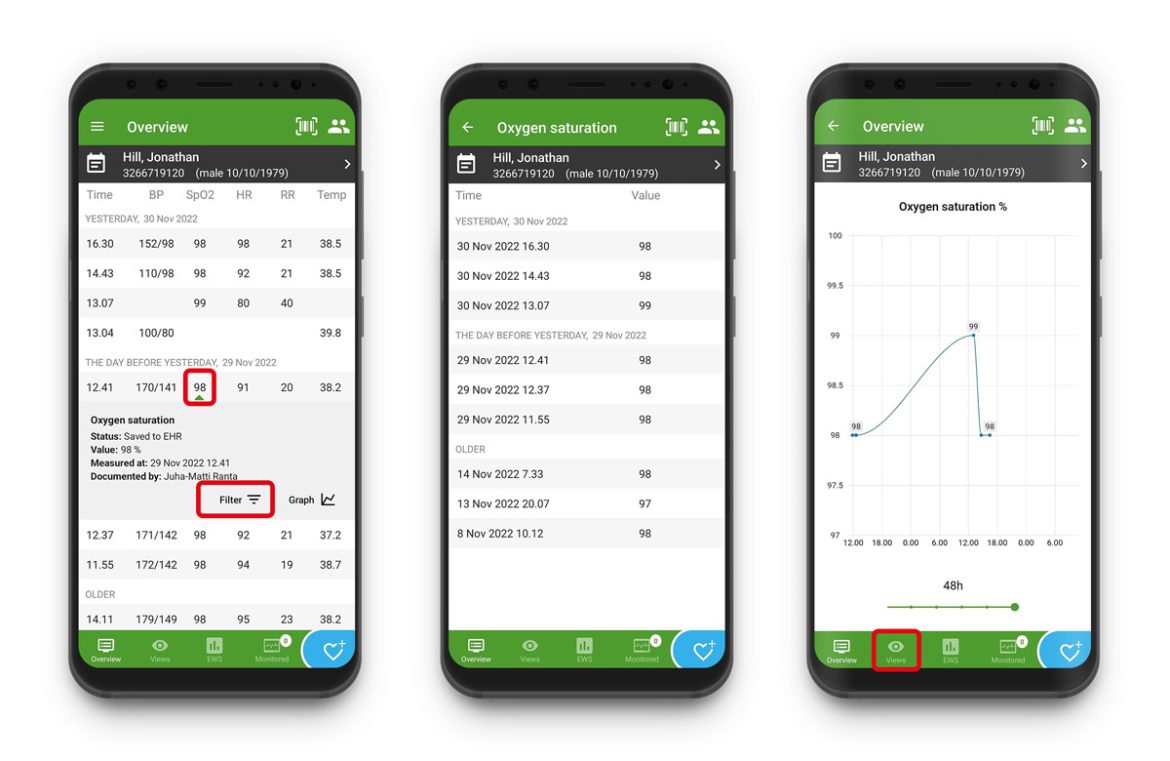
Does the patient have a lot of measured values and is it difficult to extract the required information from the view? The view can be filtered! For example, to view oxygen saturation values measured from a patient, first tap one of the measurement rows in the summary view and then the saturation column on that row. Notice the small green cursor below the value. Now you can tap the filter button. You can see all the patient’s saturation values in chronological order from newest to oldest.
On the Views tab, you can also select only vitals or fluids, for example. If your organisation uses Graphs, it can also be found in the same place.
4. Amendment of existing entries
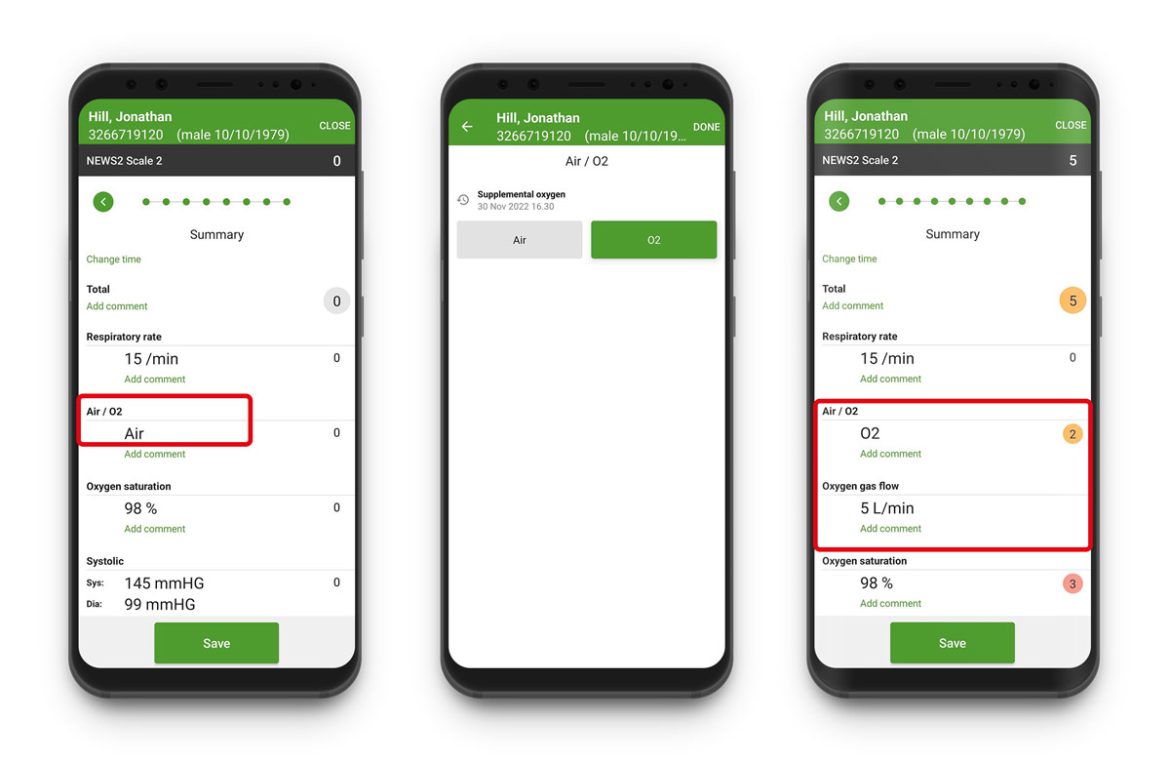
Did you make a typo? Most entries (e.g., observation values, EWS subscores, sections of risk assessment forms) can still be edited before they are saved in the patient information system on the summary page. On the summary page, tap the value or item that you wish to edit. If you have already saved the data with the Medanets app, it has been sent to the patient information system and in most cases can no longer be edited in the app. The necessary modifications must be made to the patient information system. The Cerner Millennium and DIPS EHRs are exceptions: with them, the unrecording needs to be done in the Medanets app.
5. Transfer to the Patient Card
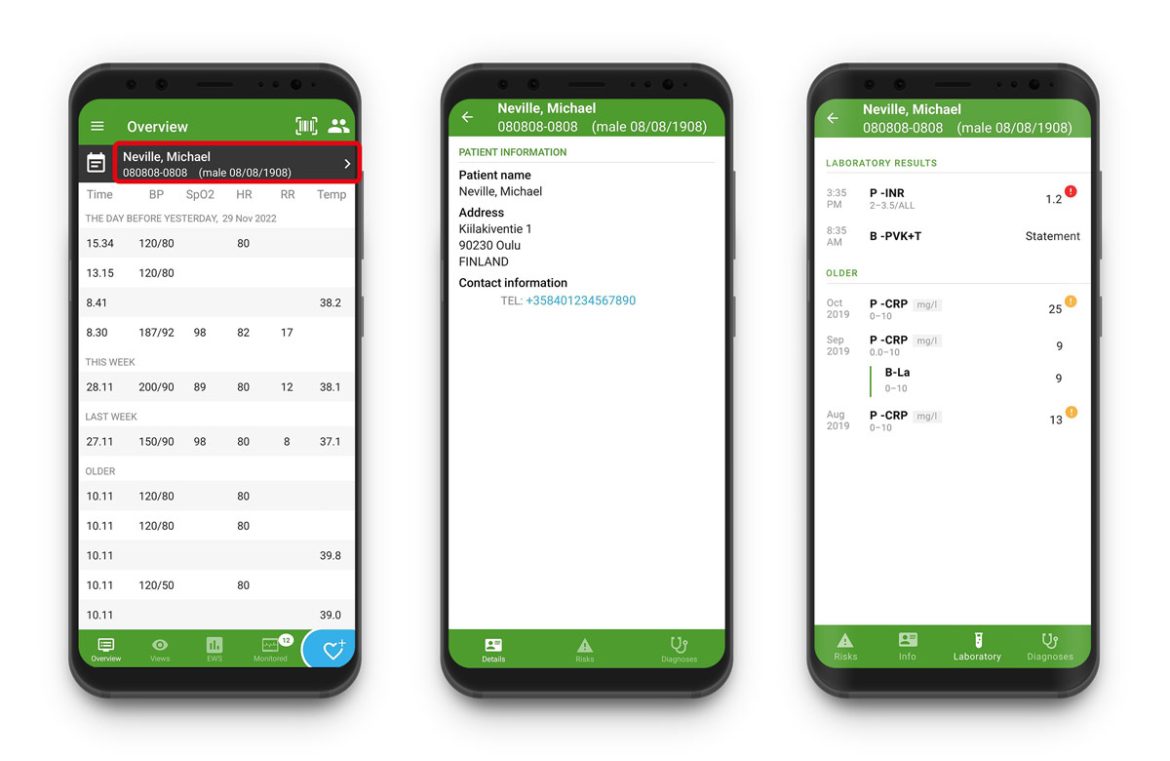
In the latest version of the app, the Patient Card feature is no longer found in the main menu. Instead, you can access each patient’s Patient Card by tapping the patient’s name (black bar at the top of the screen). The patient must be identified or selected first. The Patient Card is a feature separately acquired for the Medanets app, which includes basic patient information, next of kin information, allergies, risks, diagnoses and laboratory results (depending on available interfaces).
